Need to setup Custom Messaging on a PIP? Submitting a request is a simple procedure. Here's a step by step guide:
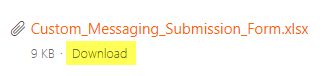
Step 1: Download the Custom Messaging Submission Form here and save it to your computer.
(Note: Requests submitted without a Custom Messaging Submission Form will be rejected until a form is submitted.)
Step 2: Open the Custom Messaging Submission Form in Microsoft Excel. There are three (3) columns in the spreadsheet:
- [A] PIP Message (45 Characters)
- [B] PIP Accordion (550 Characters)
- [C] PLP Stripe (35 Characters)
Column [A]

Enter the copy you want to appear in the PIP Message.
(Note: Be mindful that there is a 45 character limit.)

Column [B]

Enter the copy you want to appear in the PIP Accordion.
(Note: Be mindful that there is a 550 character limit.)
Column [C]

Enter the copy you want to appear in the PLP Stripe.
(Note: Be mindful that there is a 35 character limit.)
Step 3: Sign into your account on the HomeDepot.ca Digital Promotions Portal and click the "Submit a request" button in the top-right corner of the site.

Step 4: Under "How can we assist you today?", select "Promotions" from the drop-down menu.

Step 5: Under "Promotion Type", select "Custom Messaging" from the drop-down menu.

Step 6: Fill out the remaining required (*) fields on the request form and attach your Custom Messaging Submission Form to the Attachments bar at the bottom. If you attach the wrong file, simply click the "x" to the right of that file's name to remove if from your request and re-attach the correct file.
(Note: The Attachments bar has a 20MB size limit.)

Step 7: Once the request form has been filled out, click "Submit" and your request will enter the queue. You will be sent a confirmation email that your request has been received with a ticket number, which you can use to track the status of your request.

Comments
0 comments
Please sign in to leave a comment.